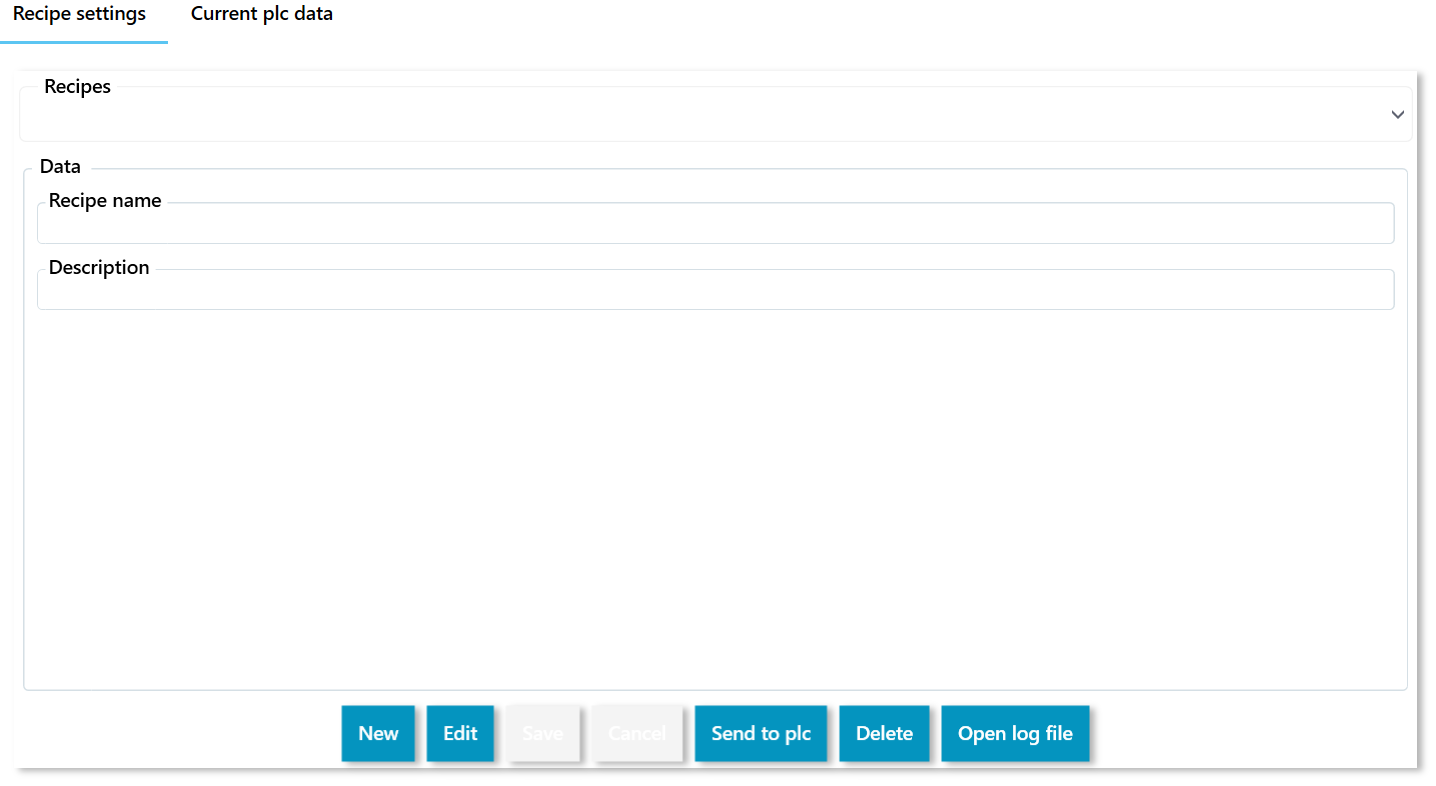
Recipes
We will create a simple recipe control like this.
 This example shows an example of Recipe user control that stores, retrieves, uploads, and keeps track of changes.
<!-- Renderable content control that displays _recipe object with presentation type 'Settings' this means that the renderer will choose View 'stRecipeSettingsView' and ViewModel 'stRecipeSettingsViewModel'-->
<vortex:RenderableContentControl DataContext="{Binding PLC.RecipeData._recipe}" PresentationType="Settings">
<!-- This will override default root container (StackPanel) with Grid -->
    <vortex:RenderableContentControl.RootContainer>
        <Grid/>
    </vortex:RenderableContentControl.RootContainer>
</vortex:RenderableContentControl>
Recipe user control
If you need to have more complex logic behind your UI user controls and you need to decouple UI from the code, you can use the MVVM pattern. This example is - for simplicity - not the pure form of MVVM. If you want to know more about MVVM, you can search online here is just one of them.
Few notes about the rendering
When the rendering system will detect that a
Viewhas respectiveViewModeland thatViewModelwill be automatically set asDataContextof givenView. The respective twin object is set to the propertyModelof the ViewModel class. When there is a view that does not have a corresponding ViewModel class, the renderer will set DataContext the instance of the TwinObject.
What if we have a ViewModel class?
stRecipeSettingsViewwill have DataContextstRecipeSettingsViewModelof which propertyModelwill be instance of stRecipe class [TwinObject]
What if we do not have a ViewModel class?
stRecipeSettingViewwill have DataContext an instance ofstRecipeclass.
Things to note in this example
Instead of using RenderableContentControl, we are using C# code to generate the UI. The stRecipeSettingsView contains simple ContentControl element that binds to the property DataPresentation of stRecipeSettingsViewModel
   <GroupBox Header="Data"
             Grid.Row="1"
             Margin="5">
             <ScrollViewer>
                    <ContentControl Content="{Binding DataPresentation}"/>
             </ScrollViewer>
    </GroupBox>
DataPresentation property is set in ViewModel object by selecting the editable or read-only form.
private const string DisplayModePresentationType = "ShadowDisplay";

private const string EditModePresentationType = "ShadowControl";

private void EditDataMode()
{
     this.DataPresentation = LazyRenderer.Get.CreatePresentation(EditModePresentationType, this.Recipe);
     this.SetUpLogging();
     this.LockRecipeSelection = true;
}

private void DisplayDataMode()
{
    this.DataPresentation = LazyRenderer.Get.CreatePresentation(DisplayModePresentationType, this.Recipe);
    this.LockRecipeSelection = false;
}
Quickly explore auto-generated items
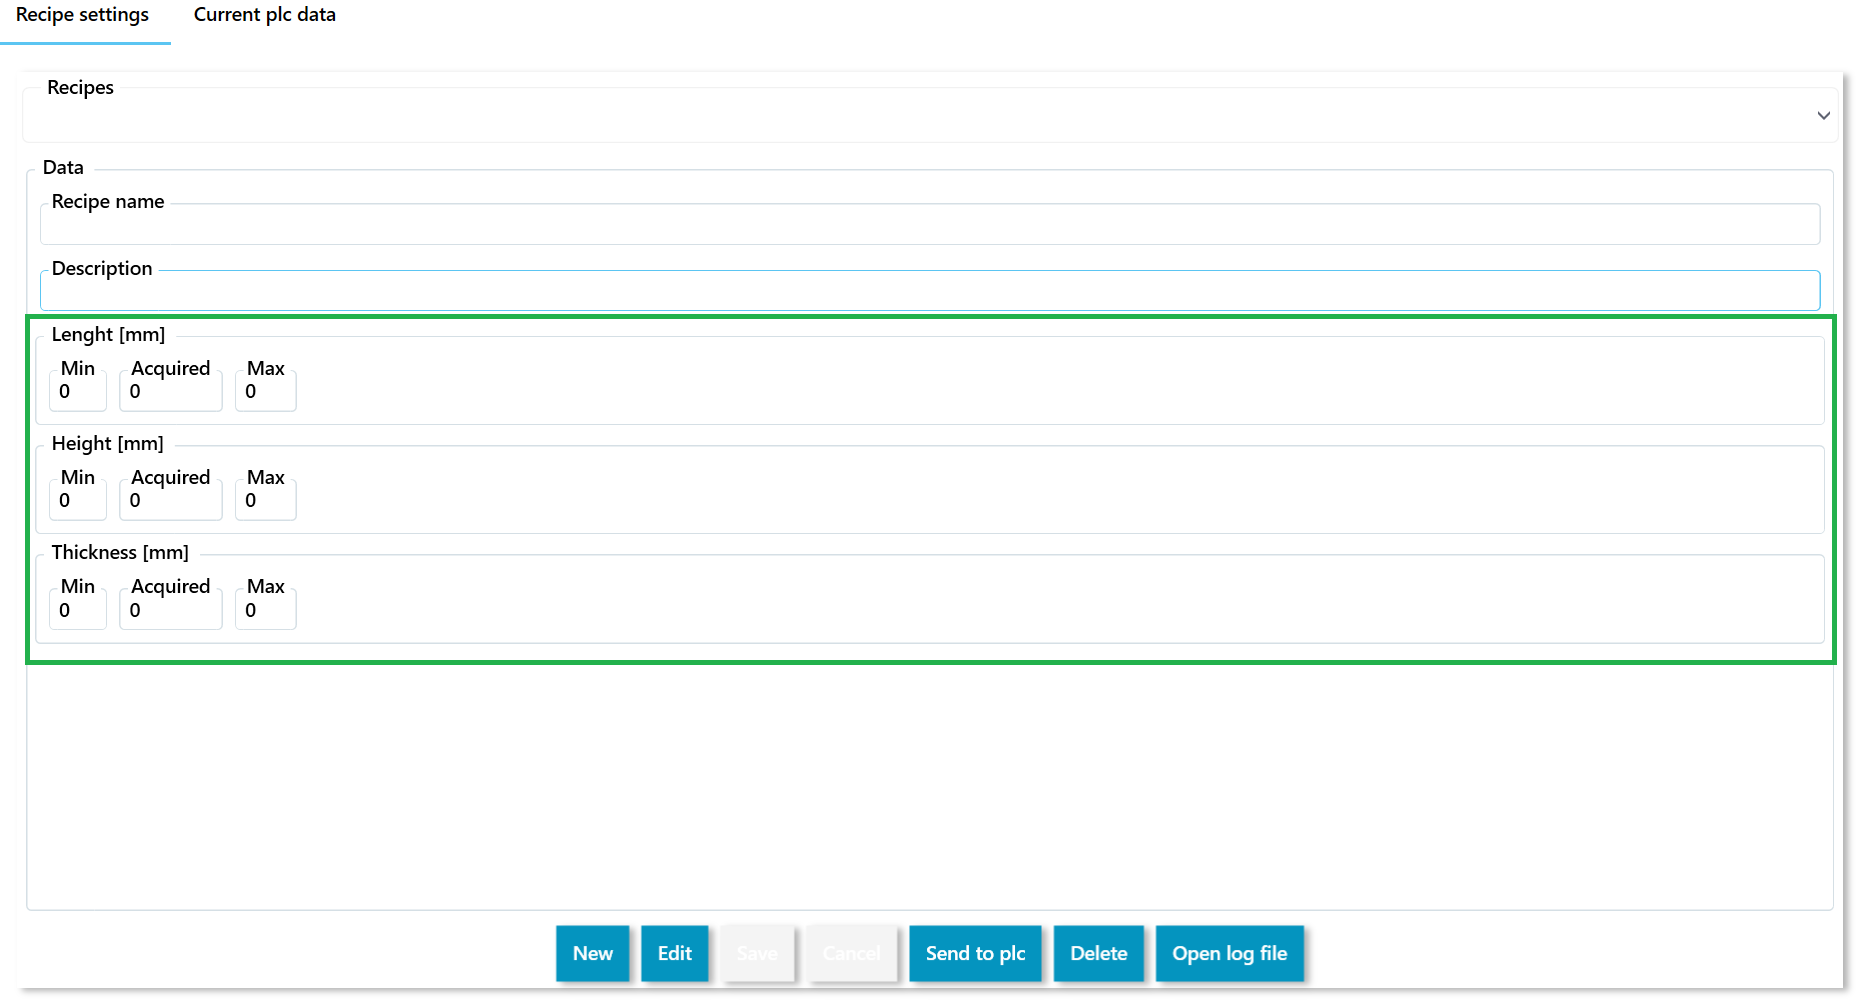
In order to quickly check the way, the recipe system will scale uncomment the code in stRecipe structure. Run the compiler, load program to the PLC, and run the application. You should get the result shown below.
Prior to modification
TYPE stRecipe :
STRUCT
    {attribute addProperty Name "<#Recipe name#>"}
    _recipeName : STRING;
    {attribute addProperty Name "<#Description#>"}
    _description : STRING(255);
    // Uncomment following lines run the comiler and check that the fiels are added to the UI, and you can save and retrieve the newly added variables.
    (*{attribute addProperty Name "<#Lenght#> [mm]"}
    _lenght : stContinuousValueLimits;
    {attribute addProperty Name "<#Height#> [mm]"}
    _height : stContinuousValueLimits;
    {attribute addProperty Name "<#Thickness#> [mm]"}
    _thikness : stContinuousValueLimits;*)
END_STRUCT
END_TYPE

After modification
TYPE stRecipe :
STRUCT
    {attribute addProperty Name "<#Recipe name#>"}
    _recipeName : STRING;
    {attribute addProperty Name "<#Description#>"}
    _description : STRING(255);
    {attribute addProperty Name "<#Length#> [mm]"}
    _lenght : stContinuousValueLimits;
    {attribute addProperty Name "<#Height#> [mm]"}
    _height : stContinuousValueLimits;
    {attribute addProperty Name "<#Thickness#> [mm]"}
    _thikness : stContinuousValueLimits;
END_STRUCT
END_TYPE

What how to video
